

Here is a little do it yourself you can do with your kids to protect them from having damage to their eyes.
Overview
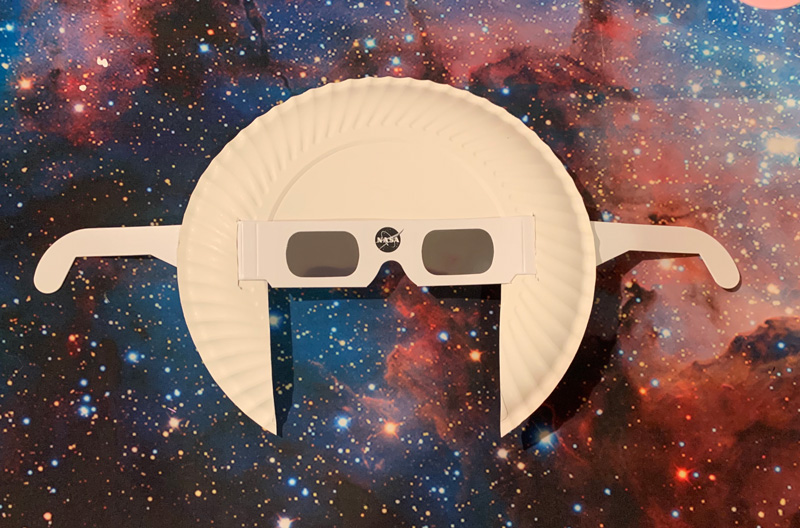
This hands-on activity is the construction of an extended coverage area of eclipse glasses to provide extra protection for safely viewing a solar eclipse. This makes it harder to look outside the lenses on the eclipse glasses.
Materials Required
Materials:
- ISO Approved Solar Eclipse viewing glasses (ISO requirements: 12312-2)
- Paper Plates (medium, or large)
- Scissors
- Clear Tape
- Pencil, Pen, or Marker
Procedure
Remember to never look directly at the Sun without proper safety equipment.
Teacher Preparation:
Teachers can prepare the plates for students or have students make them. It is essential that they are checked to make sure there are not gaps that sunlight can get through. The cardboard from the eclipse glasses should completely cover the cut outs in the plates.
- Inspect the ISO approved solar eclipse viewing glasses to ensure that the lenses are not scratched or damaged.
- Select a paper plate size that will best fit the students.
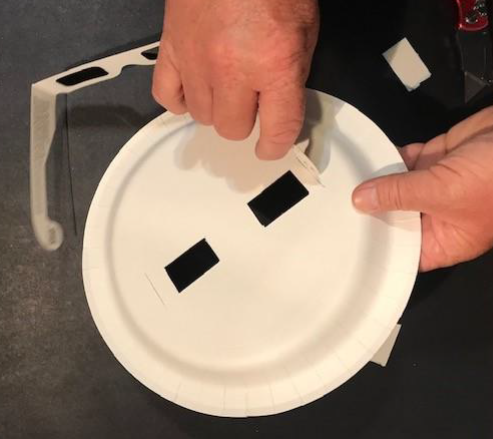
- With the plate resting face up, place the eclipse glasses in the middle of the plate.
- Using a marking tool, trace the outline of the eclipse glasses.
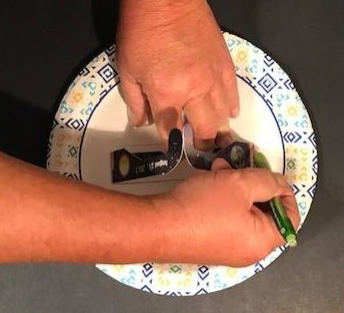
- Mark the location of the lenses on the plate without touching the lenses on the eclipse glasses.
- Mark the edges where the eclipse glass arms connect.
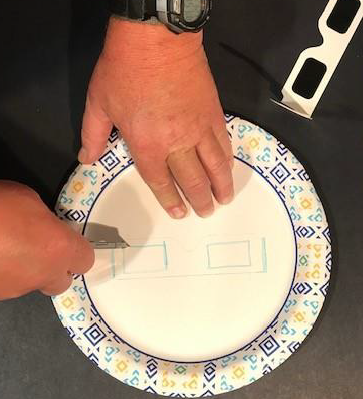
- Cut sections out of the paper plate for the lenses, and then cut slots in the plate for the arms of the eclipse glasses.
- Remove the lens cut outs.
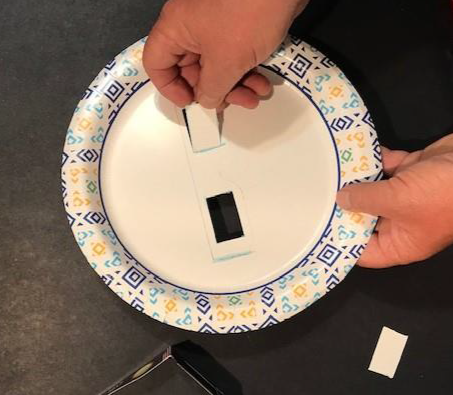
- Insert the arms of the eclipse glasses through the slots to make sure that the lenses are lined up with the holes.
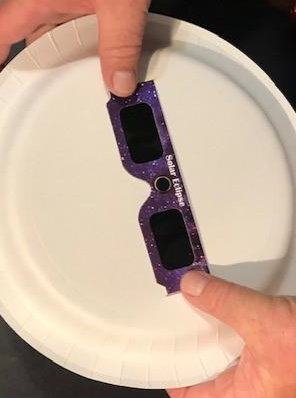
- Make sure that the outside edge of the glasses completely covers all cutout sections.
- Do not tape glasses to the plates if you are planning to decorate them.
Procedure:
- Prepare plates as described in the teacher preparation section.
- Distribute the plates to the students.
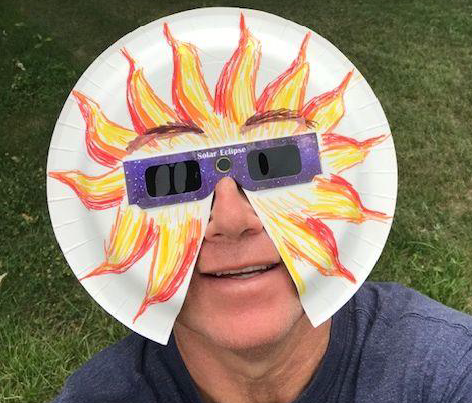
- Optional: Have students decorate the plates.
-
Cut out a triangular section for the nose and mouth. A narrow triangle might work better for smaller children.
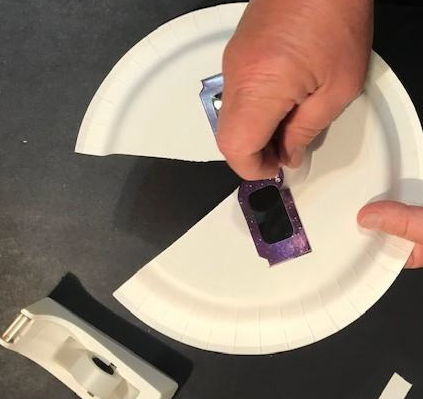
- Tape the glasses to the plate to secure them in place. Make sure that you tape the cardboard and not the lenses. If students do this, the teacher should check each pair of glasses to make sure they were taped properly and will provide the extra protection from paper plate.
- Check for proper fit.
VARIATIONS
For younger children the earpieces might not fit securely. In that case, a string, ribbon, or rubber band can be attached to the sides of the plate so that the child can wear it like a mask. The string will help hold the protective shield in place.
Source: MyNASAdata
https://mynasadata.larc.nasa.gov/lesson-plans/solar-eclipse-safety-activity